


Marvel and DC Weekly New Comics Release List Tracker
March 11, 2021


Navigation Bar

Apply Theme
- Introduction
- Keywords
- Brands
- Hardware
- Software
- Description
- Step 1: Designing and soldering the Comics Release List Tracker PCB
- Step 2: Setting up a LAMP web server on Raspberry Pi
- Step 3: Developing the New Comics Releases web application in PHP to obtain the weekly comics release lists
- Step 3.1: Setting up the web application on Raspberry Pi
- Step 4: Setting up the Arduino Nano 33 IoT
- Step 5: Programming the Arduino Nano 33 IoT
- Step 5.1: Playing the Spider-Man theme song with a buzzer
- Connections and Adjustments
- Modes and Features
- Demonstration
- Project GitHub Repository
- Schematics
- Code
- Custom assets
- See on other platforms
- Related projects
Display comics release lists of this, next, and previous weeks via this amazing ? PCB playing Spider-Man theme song and Nano 33 IoT :)
Keywords
Hardware
- [1]PCBWay Custom PCB
- [1]Arduino Nano 33 IoT
- [1]Raspberry Pi 3B+ or 4
- [1]Nokia 5110 Screen
- [1]Buzzer
- [1]Potentiometer
- [1]Potentiometer Knob
- [1]5mm Common Cathode RGB LED
- [1]Vibration Motor
- [5]Button (6x6)
- [5]1K Resistor
- [1]Power Jack
Software
Description
I am a huge comic book fan and collect issues of my favorite titles every week. Therefore, I check weekly comics release lists from publishers every week. Even though there are umpteen web and mobile applications to inspect weekly new comics release lists from publishers, I wanted to create an unusual weekly comics release list tracking device with Arduino by which I can scrutinize weekly comics lists in a geeky way :)
First of all, to obtain weekly comics release lists from the ShortBoxed comics API, I developed a web application in PHP running on Raspberry Pi.
Then, I used an Arduino Nano 33 IoT to get comics release lists transferred by the PHP web application and display them with a Nokia 5110 Screen.
After completing wiring on a breadboard and testing the code, I designed a PCB (Comics Release List Tracker) inspired by one of my favorite comic book heroes: Spider-Man. It became a stylish and suitable addition to my comic book collection as an efficient new comics release list tracker with some spectacular features :)
The device shows the comics release list of:
- This Week
- Next Week
- Previous Week
Also, it has these unnecessary yet funny additional features 😃
- Plays the Spider-Man theme song (1967) before showing a list.
- Displays graphics adjusted by a potentiometer.
Huge thanks to PCBWay for sponsoring this project.


Step 1: Designing and soldering the Comics Release List Tracker PCB
Before prototyping my PCB design, I tested all connections and wiring with the Arduino Nano 33 IoT on the breadboard.

Then, I designed the Comics Release List Tracker PCB by using KiCad. I attached the Gerber file of the PCB below, so if you want, you can order this PCB from PCBWay to create a stylish and fully-functional weekly new comics release list tracker inspired by Spider-Man :)
Click here to inspect and order this PCB directly on PCBWay.


First of all, by using a soldering iron, I attached headers (female), buzzer, potentiometer, vibration motor, 5mm common cathode RGB LED, 6x6 pushbuttons, 1K resistors, and the power jack.
Component list on the PCB:
A1 (Headers for Arduino Nano 33 IoT)
S1 (Headers for Nokia 5110 Screen)
BZ1 (Buzzer)
RV1 (Potentiometer)
V1 (Vibration Motor)
D1 (5mm Common Cathode RGB LED)
K1, K2, K3, K4, K5 (6x6 Pushbutton)
R1, R2, R3, R4, R5 (1K Resistor)
J1 (Power Jack)


Step 2: Setting up a LAMP web server on Raspberry Pi
If you are a novice in programming with Raspberry Pi, you can inspect well-explained instructions and tutorials on the official Raspberry Pi website.
To go to the official Raspberry Pi setting up tutorial, click here.

⭐ Open a terminal window by selecting Accessories > Terminal from the menu.
⭐ Install the apache2 package by typing the following command into the terminal and pressing Enter:
sudo apt-get install apache2 -y

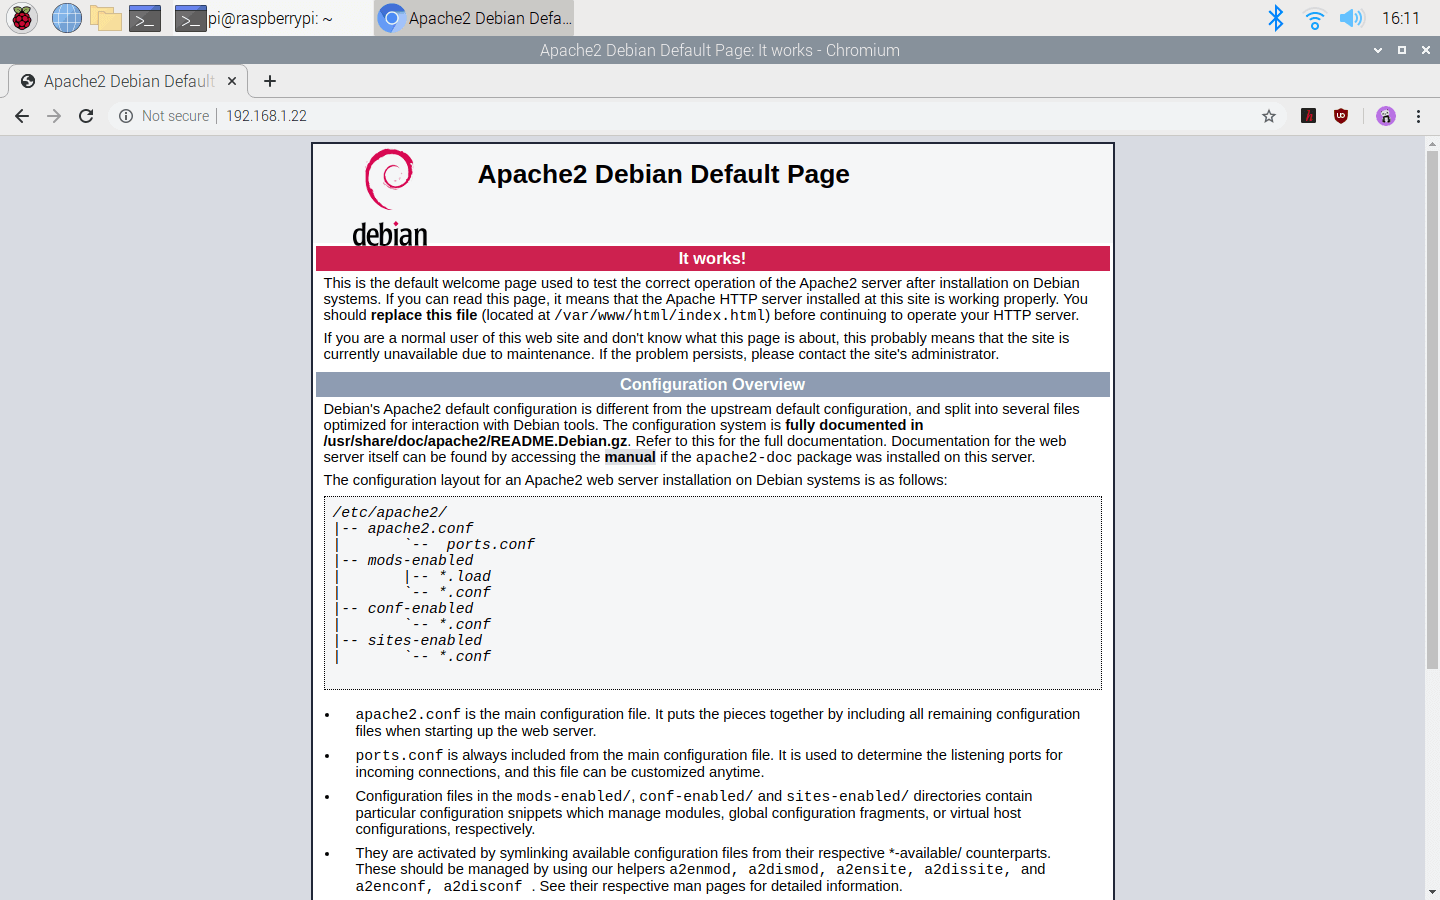
⭐ To test the server, open Chromium by selecting Internet > Chromium Web Browser from the menu and enter http://localhost.
⭐ If you want, you can use the IP address of your Raspberry Pi as well.
hostname -I

⭐ Install the PHP package with the following command:
⭐ Do not forget to update the Pi.
sudo apt-get update
sudo apt-get install php -y

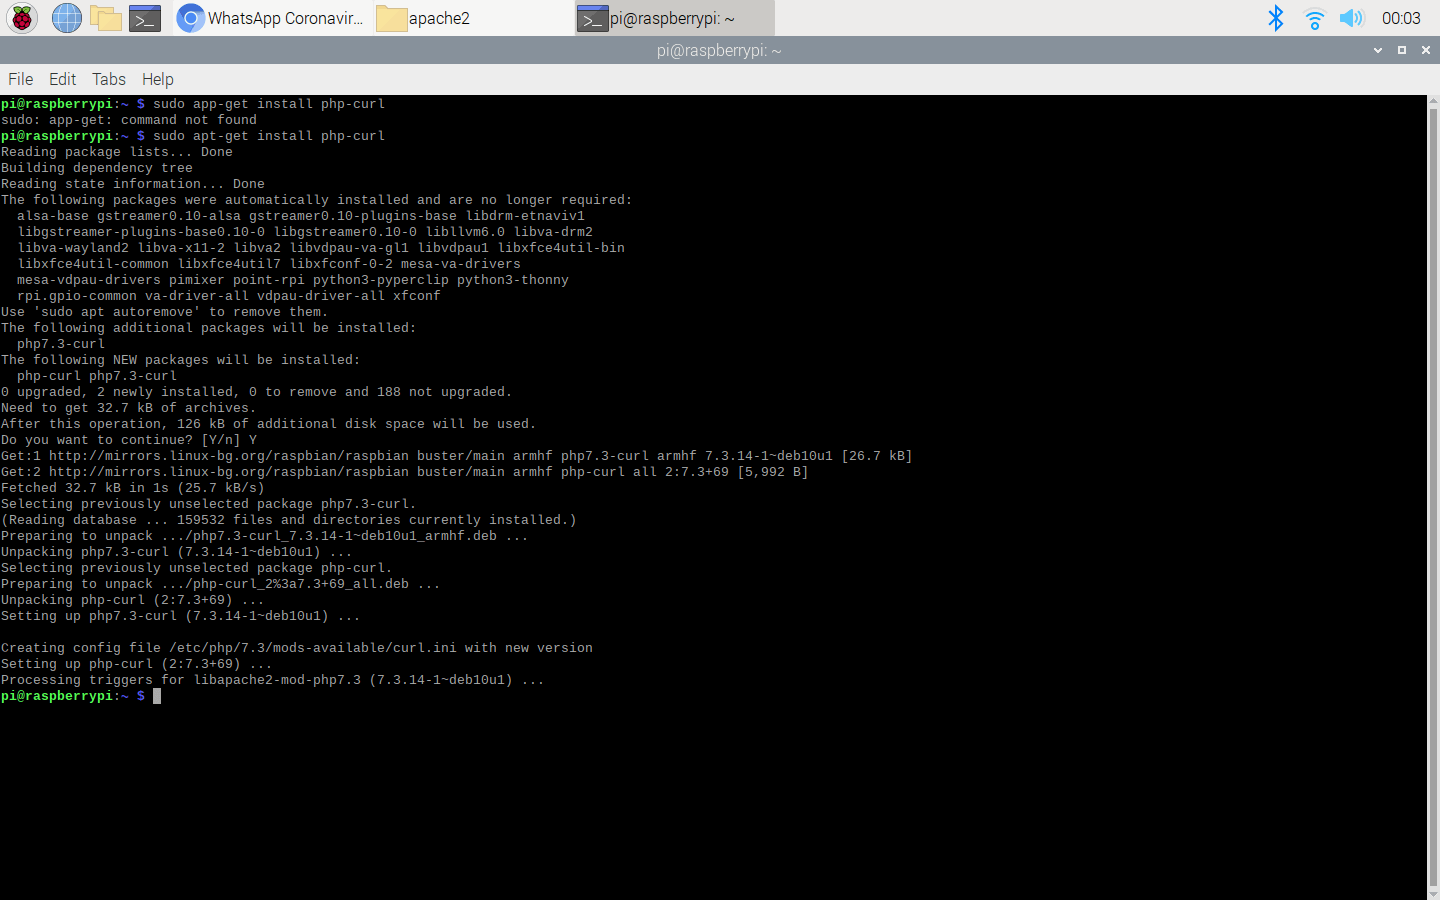
⭐ To be able to utilize the ShortBoxed comics API, install the php-curl package:
sudo apt-get install php-curl
⭐ Then, restart the apache server to be able to use the installed packages on the localhost:
sudo service apache2 restart
Step 3: Developing the New Comics Releases web application in PHP to obtain the weekly comics release lists
This PHP web application is for fetching comics information from the ShortBoxed comics API. The API lets the user retrieve and query comics data in JSON.
API Domain: api.shortboxed.com
Although there are lots of features provided by the API, I used these three features below:
⭐ Returns this week's comics release list:
GET /comics/v1/new
        comics:
        [
            {
                "publisher": "MARVEL COMICS",
				"description": "Peter Parker gets a new job! Spidey gets a new look! And Kingpin's plans start coming together! Rated T+ ",
				"title": "AMAZING SPIDER-MAN #61",
				"price": "$3.99",
				"creators": "(W) Nick Spencer (A/CA) Patrick Gleason",
				"release_date": "2021-03-10",
				"diamond_id": "JAN210648"
            },

            ...
        ]
⭐ Returns next week's comics release list:
GET /comics/v1/future
        comics:
        [
            {
			    "publisher": "DC COMICS",
				"description": "Devastation in Gotham City! Following the events of a massive explosion in midtown, Batman and Superman pick up the pieces to learn who rigged the Atomic Skull like a bomb...and will they do it again?",
				"title": "BATMAN SUPERMAN #10",
				"price": "$3.99",
				"creators": "(W) Joshua Williamson (A/CA) Clayton Henry",
				"release_date": "2021-07-29.",
				"diamond_id": "MAR200528"
            },

            ...
        ]
⭐ Returns previous week's comics release list:
GET /comics/v1/previous
        comics:
        [
            {

			    "publisher": "MARVEL COMICS",
				"description": "THE FIGHT TO BECOME THE ALL-NEW PHOENIX HEATS UP! As the greatest heroes and villains of the Marvel Universe are trapped within the battle to decide the all-new Phoenix.",
				"title": "AVENGERS #43",
				"price": "$3.99", "creators": "(W) Jason Aaron (A) Javi Garron (CA) Leinil Francis Yu",
				"release_date": "2021-03-03",
				"diamond_id": "JAN210669"
            },

            ...
        ]
The web application consists of one file - index.php. You can download the web application below to install it on your Raspberry Pi - New_Comics_Releases.zip.
💻 index.php
⭐ Define the 'comics' class to print requested comics release lists.
⭐ In the get_this_week_releases() function:
⭐ Get this week's released comics list from the ShortBoxed comics API by using the json_decode() and file_get_contents() functions.
⭐ Print new comics from selected publishers - Marvel Comics and DC Comics.
⭐ Syntax:
%publisher, title **** ...%date%
	public function get_this_week_releases(){
		// Get this week's released comics list from the Shortboxed comics API.
		$new_comics = json_decode(file_get_contents("https://api.shortboxed.com/comics/v1/new"));
		// Print new comics from selected publishers.
		$date;
		echo "%";
		foreach($new_comics->comics as $comic){
			if($comic->publisher == "MARVEL COMICS" || $comic->publisher == "DC COMICS" /*|| $comic->publisher == "IMAGE COMICS"*/){
				echo $comic->publisher.", ".$comic->title." **** ";
				$date = $comic->release_date;
			}
		}
		echo "%".$date."%";
	}
⭐ In the get_next_week_releases() function:
⭐ Get next week's comics list from the ShortBoxed comics API by using the json_decode() and file_get_contents() functions.
⭐ Print comics from selected publishers - Marvel Comics and DC Comics.
⭐ Syntax:
%publisher, title **** ...%date%
	public function get_next_week_releases(){
		// Get next week's comics list from the Shortboxed comics API.
		$next_comics = json_decode(file_get_contents("https://api.shortboxed.com/comics/v1/future"));
		// Print comics from selected publishers.
		$date;
		echo "%";
		foreach($next_comics->comics as $comic){
			if($comic->publisher == "MARVEL COMICS" || $comic->publisher == "DC COMICS" /*|| $comic->publisher == "IMAGE COMICS"*/){
				echo $comic->publisher.", ".$comic->title." **** ";
				$date = $comic->release_date;
			}
		}
		echo "%".$date."%";
	}
⭐ In the get_previous_week_releases() function:
⭐ Get previous week's released comics list from the ShortBoxed comics API by using the json_decode() and file_get_contents() functions.
⭐ Print comics from selected publishers - Marvel Comics and DC Comics.
⭐ Syntax:
%publisher, title **** ...%date%
	public function get_previous_week_releases(){
		// Get previous week's released comics list from the Shortboxed comics API.
		$previous_comics = json_decode(file_get_contents("https://api.shortboxed.com/comics/v1/previous"));
		// Print comics from selected publishers.
		$date;
		echo "%";
		foreach($previous_comics->comics as $comic){
			if($comic->publisher == "MARVEL COMICS" || $comic->publisher == "DC COMICS" /*|| $comic->publisher == "IMAGE COMICS"*/){
				echo $comic->publisher.", ".$comic->title." **** ";
				$date = $comic->release_date;
			}
		}
		echo "%".$date."%";
	}
⭐ Define a new object for the 'comics' class - releases.
⭐ Print the requested comics release list by the device via a Get request - this week, previous week, or next week.
$releases = new comics();
// Print the requested comics release list by the device - this week, previous week, or next week.
if(isset($_GET["q"]) && $_GET["q"] != ""){
	if ($_GET["q"] == "this") $releases->get_this_week_releases();
	if ($_GET["q"] == "previous") $releases->get_previous_week_releases();
	if ($_GET["q"] == "next") $releases->get_next_week_releases();
}


Step 3.1: Setting up the web application on Raspberry Pi
⭐ First of all, extract the New_Comics_Releases.zip folder and move the application folder (New_Comics_Releases) to the apache server (/var/www/html) by using the terminal since the apache server is a protected location.
sudo mv /home/pi/Downloads/New_Comics_Releases /var/www/html/


⭐ Go to the web application:
http://localhost/New_Comics_Releases/

⭐ To test whether the web application obtains requested comics release lists successfully - this week, next week, and previous week:
http://localhost/New_Comics_Releases/?q=this

http://localhost/New_Comics_Releases/?q=next

http://localhost/New_Comics_Releases/?q=previous

Step 4: Setting up the Arduino Nano 33 IoT
If you are a novice in programming with the Arduino Nano 33 IoT, follow the steps below to program it with the Arduino IDE.
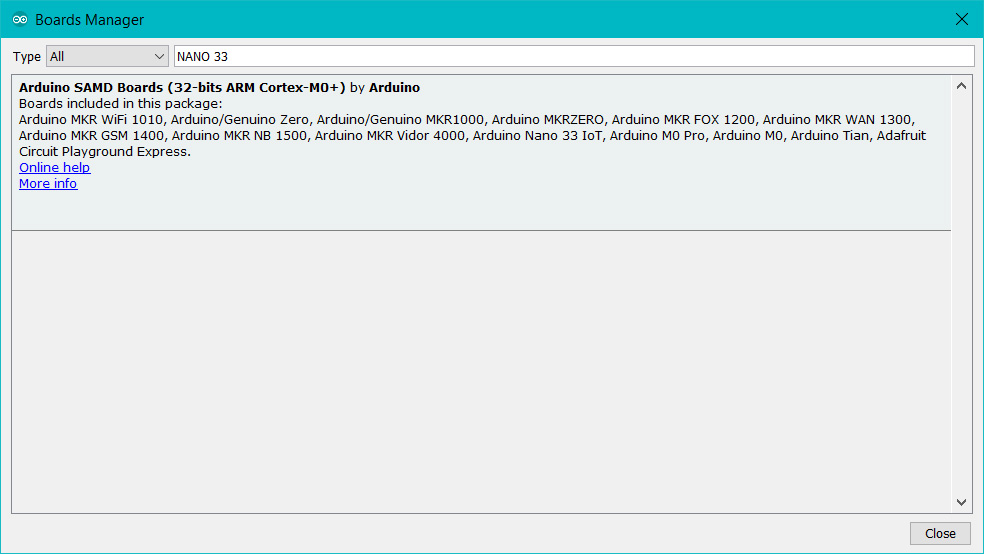
⭐ Download the required drivers - Arduino SAMD Core - as explained here.
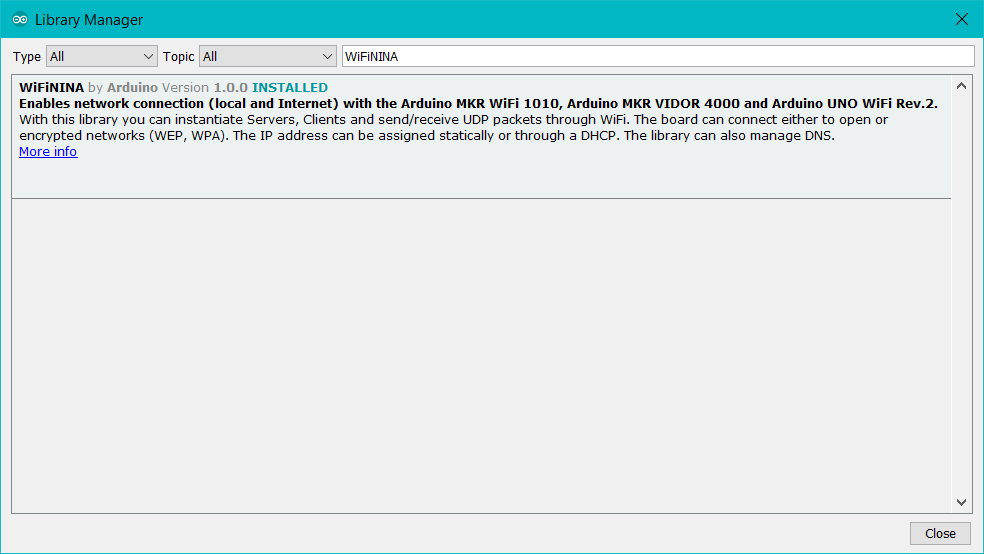
⭐ To be able to connect to the WiFi, download the WiFiNINA library from here.
Step 5: Programming the Arduino Nano 33 IoT
Download the required libraries to be able to control the modules:
Nokia 5110 Screen | Library
⭐ Include required libraries and define the WiFi settings.
#include <SPI.h>
#include <WiFiNINA.h>
#include <LCD5110_Graph.h>
#include "pitches.h"

char ssid[] = "<_SSID_>";        // your network SSID (name)
char pass[] = "<_PASSWORD_>";    // your network password (use for WPA, or use as key for WEP)
int keyIndex = 0;                // your network key Index number (needed only for WEP)
int status = WL_IDLE_STATUS;

// Enter the IPAddress of your Raspberry Pi.
IPAddress server(192, 168, 1, 20);

// Initialize the Ethernet client library
WiFiClient client; /* WiFiSSLClient client; */
⭐ Define the Nokia 5110 screen settings and the graphics (monochrome images).
⭐ To create different graphics (monochrome images), go to Monochrome Image Converter.
// Define screen settings.
LCD5110 myGLCD(2,3,4,5,6);

extern uint8_t SmallFont[];
// Define the graphics:
extern uint8_t spiderman[];
extern uint8_t batman[];
extern uint8_t daredevil[];
extern uint8_t marvel[];
extern uint8_t superman[];
⭐ Check for the WiFi module to verify the connection.
  if (WiFi.status() == WL_NO_MODULE) { myGLCD.print("Connection Failed!", 0, 8); myGLCD.update(); while (true); }
  // Attempt to connect to the Wifi network:
  while (status != WL_CONNECTED) {
    myGLCD.print("Waiting...", 0, 8);
    myGLCD.print("Attempting to", 0, 16);
    myGLCD.print("connect to", 0, 24);
    myGLCD.print("WiFi !!!", 0, 32);
    myGLCD.update();
    // Connect to WPA/WPA2 network. Change this line if using open or WEP network:
    status = WiFi.begin(ssid, pass);
    // Wait 10 seconds for connection:
    delay(10000);
  }
⭐ In the change_menu_options() function:
⭐ Increase or decrease the menu option number (selected) using the Up and Down buttons.
⭐ Activate the vibration motor on every change.
⭐ Depending on the menu option number (selected), change the boolean status.
void change_menu_options(){
  // Increase or decrease the option number using Up and Down buttons.
  if(_up == false) { selected++; digitalWrite(vib_motor, HIGH); }
  if(_down == false) { selected--; digitalWrite(vib_motor, HIGH); }
  if(selected < 0) selected = 4;
  if(selected > 4) selected = 1;
  delay(100);
  digitalWrite(vib_motor, LOW);
  // Depending on the selected option number, change boolean status.
  switch(selected){
    case 1:
      this_week = true;
      next_week = false;
      previous_week = false;
      graphics = false;
    break;
    case 2:
      this_week = false;
      next_week = true;
      previous_week = false;
      graphics = false;
    break;
    case 3:
      this_week = false;
      next_week = false;
      previous_week = true;
      graphics = false;
    break;
    case 4:
      this_week = false;
      next_week = false;
      previous_week = false;
      graphics = true;
    break;
  }
}
⭐ After selected, if this_week, next_week, or previous_week menu option is activated by pressing the OK button:
⭐ Play the Spider-Man theme song (1967) with the buzzer.
⭐ Get the requested list from the web application - this week, next week, or the previous week.
⭐ Print the obtained comics release list and release date.
⭐ Scroll the fetched comics release list by using the Right and Left buttons.
⭐ If the Up or Down button is pressed, exit and return to the interface.
  if(this_week == true){
    do{
      myGLCD.invertText(true);
      myGLCD.print("A. This Week", 0, 16);
      myGLCD.invertText(false);
      myGLCD.update();
      adjustColor(255, 0, 255);
      delay(100);
      if(_OK == false){
        myGLCD.clrScr();
        myGLCD.update();
        activated = true;
        // Play the Spider-Man Theme Song:
        myGLCD.print("Playing...", CENTER, 16);
        myGLCD.update();
        play_Melody();
        myGLCD.clrScr();
        myGLCD.update();
        // Get the requested list from the web application:
        make_a_get_request("/New_Comics_Releases/?q=this");
        myGLCD.clrScr();
        myGLCD.update();
        while(activated == true){
          read_controls();
          myGLCD.print("This Week:", 0, 0);
          myGLCD.print(_date, CENTER, 16);
          scrolling_text(comics_list, 32);
          // Exit.
          if(_up == false || _down == false){ activated = false; x = 0; _date = ""; comics_list = ""; myGLCD.clrScr(); myGLCD.update(); }
        }
      }
    }while(this_week == false);
  }

  ...
⭐ In the make_a_get_request() function:
⭐ Connect to the web application named New Comics Releases.
⭐ If the connection is successful, make a Get request to obtain weekly comics release lists of this week, next week, or the previous week.
⭐ If there are incoming bytes available, get the response from the web application.
⭐ Split the response string by the predefined delimiter (%) to glean information as substrings - comics_list and _date.
void make_a_get_request(String application){
  // Connect to the web application named New_Comics_Releases. Change '80' with '443' if you are using SSL connection.
  if(client.connect(server, 80)){
    // If successful:
    myGLCD.print("Connected to", 0, 8);
    myGLCD.print("the server!!!", 0, 16);
    myGLCD.update();
    // Make an HTTP Get request:
    client.println("GET " + application + " HTTP/1.1");
    client.println("Host: 192.168.1.22");
    client.println("Connection: close");
    client.println();
  }else{
    myGLCD.print("Connection", 0, 8);
    myGLCD.print("Error!!!", 0, 16);
    myGLCD.update();
  }
  delay(2000); // Wait 2 seconds after connection...
  // If there are incoming bytes available, get the response from the web application.
  String response = "";
  while (client.available()) { char c = client.read(); response += c; }
  if(response != "" && response.endsWith("%")){
    // Split the response string by a pre-defined delimiter in a simple way. '%'(percentage) is defined as the delimiter in this project.
    int delimiter_1, delimiter_2, delimiter_3;
    delimiter_1 = response.indexOf("%");
    delimiter_2 = response.indexOf("%", delimiter_1 + 1);
    delimiter_3 = response.indexOf("%", delimiter_2 + 1);
    // Glean information as substrings.
    comics_list = response.substring(delimiter_1 + 1, delimiter_2);
    _date = response.substring(delimiter_2 + 1, delimiter_3);
  }
}
⭐ In the scrolling_text() function:
⭐ Scroll a given string using the Right and Left buttons on a given y coordinate (row).
void scrolling_text(String text, int y){
  int len = text.length();
  // Scroll text using Right and Left buttons.
  if(_right == false) x++;
  if(_left == false) x--;
  if(x>84) x = 84;
  if(x<=-(len*6)) x = -(len*6);
  // Print.
  myGLCD.print(text, x, y);
  myGLCD.update();
  //delay(25);
}
⭐ After selected, if the graphics menu option is activated by pressing the OK button:
⭐ Using the map() function, define a graphics (monochrome images) queue displayed depending on the potentiometer value - from 1 to 10.
⭐ If the Up or Down button is pressed, exit and return to the interface.
  if(graphics == true){
    do{
      myGLCD.invertText(true);
      myGLCD.print("D. Graphics", 0, 40);
      myGLCD.invertText(false);
      myGLCD.update();
      adjustColor(0, 255, 0);
      delay(100);
      if(_OK == false){
        myGLCD.clrScr();
        myGLCD.update();
        activated = true;
        while(activated == true){
          read_controls();
          // Define picture queue:
          int pic = map(_pot, 100, 950, 1, 10);
          if(pic == 1) myGLCD.drawBitmap(20,0,spiderman,40,40);
          if(pic == 2) myGLCD.clrScr();
          if(pic == 3) myGLCD.drawBitmap(10,0,batman,60,32);
          if(pic == 4) myGLCD.clrScr();
          if(pic == 5) myGLCD.drawBitmap(2,0,daredevil,80,40);
          if(pic == 6) myGLCD.clrScr();
          if(pic == 7) myGLCD.drawBitmap(12,0,marvel,60,33);
          if(pic == 8) myGLCD.clrScr();
          if(pic == 9) myGLCD.drawBitmap(12,0,superman,60,60);
          if(pic == 10) myGLCD.clrScr();
          myGLCD.update();
          // Exit.
          if(_up == false || _down == false){ activated = false; myGLCD.clrScr(); myGLCD.update(); }
        }
      }
    }while(graphics == false);
  }


Step 5.1: Playing the Spider-Man theme song with a buzzer
I used an extra file named pitches.h. This file contains all the pitch values for typical notes. For example, NOTE_C4 is middle C. NOTE_FS4 is F sharp, and so forth.
#define NOTE_B0  31
#define NOTE_C1  33
#define NOTE_CS1 35
#define NOTE_D1  37
#define NOTE_DS1 39
#define NOTE_E1  41
#define NOTE_F1  44
#define NOTE_FS1 46
#define NOTE_G1  49
#define NOTE_GS1 52
#define NOTE_A1  55
#define NOTE_AS1 58
#define NOTE_B1  62
#define NOTE_C2  65
#define NOTE_CS2 69
#define NOTE_D2  73
#define NOTE_DS2 78
#define NOTE_E2  82
#define NOTE_F2  87
#define NOTE_FS2 93
#define NOTE_G2  98
#define NOTE_GS2 104

...
To play the Spider-Man theme song (1967) with a buzzer using the tone() function, I elicited its notes and durations from here.
⭐ In the play_Melody() function:
⭐ Define the notes in the Spider-Man theme song.
void play_Melody(){
  // Notes in the melody:
  int melody[] = {
    NOTE_C4, NOTE_DS4, NOTE_G4, NOTE_FS4, NOTE_DS4, NOTE_C4, NOTE_C4,
    NOTE_DS4, NOTE_G4, NOTE_GS4, NOTE_G4, NOTE_FS4, NOTE_DS4, NOTE_C4,
    NOTE_F4, NOTE_GS4, NOTE_C5, NOTE_B4, NOTE_B4, NOTE_F4, NOTE_C4,
    NOTE_DS4, NOTE_G4, NOTE_FS4, NOTE_DS4, NOTE_C4, NOTE_GS4, NOTE_G4,
    NOTE_G4, NOTE_F4, NOTE_DS4, NOTE_F4, NOTE_DS4, NOTE_C4,
    NOTE_G4, NOTE_GS4, NOTE_AS4, NOTE_GS4, NOTE_G4, NOTE_F4, NOTE_DS4,
    NOTE_F4, NOTE_DS4, NOTE_D4, NOTE_DS4, NOTE_G4, NOTE_GS4, NOTE_AS4,
    NOTE_GS4, NOTE_G4, NOTE_F4, NOTE_DS4, NOTE_F4, NOTE_DS4, NOTE_F4, NOTE_G4,
    NOTE_C4, NOTE_DS4, NOTE_G4, NOTE_FS4, NOTE_DS4, NOTE_C4, NOTE_C4,
    NOTE_DS4, NOTE_G4, NOTE_GS4, NOTE_G4, NOTE_FS4, NOTE_DS4, NOTE_C4,
    NOTE_F4, NOTE_GS4, NOTE_C5, NOTE_B4, NOTE_B4, NOTE_F4, NOTE_C4,
    NOTE_DS4, NOTE_G4, NOTE_FS4, NOTE_DS4, NOTE_C4, NOTE_GS4, NOTE_G4,
    NOTE_G4, NOTE_F4, NOTE_DS4, NOTE_F4, NOTE_DS4, NOTE_C4,
    NOTE_G4, NOTE_F4, NOTE_DS4, NOTE_F4, NOTE_DS4, NOTE_C4, NOTE_G4,
    NOTE_F4, NOTE_DS4, NOTE_F4, NOTE_G4, NOTE_D5
  };

  ...
⭐ Define durations in the Spider-Man theme song: 4 = quarter note, 8 = eighth note, etc.
  ...

  // Note durations: 4 = quarter note, 8 = eighth note, etc.:
  int noteDurations[] = {
    6, 8, 2, 6, 8, 2, 6,
    8, 6, 8, 8, 6, 6, 2,
    6, 8, 2, 6, 8, 2, 6,
    8, 2, 6, 8, 2, 6, 1,
    8, 8, 8, 8, 8, 1,
    6, 8, 2, 6, 8, 2, 6,
    8, 6, 8, 8, 6, 6, 2,
    6, 8, 2, 6, 8, 2, 6,
    8, 2, 6, 8, 2, 6, 1,
    8, 8, 8, 8, 8, 1,
    6, 8, 2, 6, 2, 6, 8,
    2, 6, 8, 2, 6, 8, 2,
    6, 2, 6, 8, 2, 6, 8, 1,
    6, 8, 2, 6, 8, 2, 6,
    8, 6, 8, 8, 6, 6, 2,
    6, 8, 2, 6, 8, 2, 6,
    8, 2, 6, 8, 2, 6, 1,
    8, 8, 8, 8, 8, 1,
    8, 8, 8, 8, 8, 1, 6,
    6, 8, 6, 6, 1
  };

  ...
⭐ Calculate the length of the melody array.
⭐ To calculate the note duration, take one second divided by the note type.
e.g. quarter note = 1000 / 4, eighth note = 1000 / 8, etc.
⭐ To distinguish the notes, set a minimum time between them.
Note's duration + 30%
  ...

  // Calculate the length of the melody array:
  int len = sizeof(melody) / sizeof(melody[0]);
  // Play the melody using the given notes and durations:
  for (int thisNote = 0; thisNote < len; thisNote++) {
    // To calculate the note duration, take one second divided by the note type.
    // e.g. quarter note = 1000 / 4, eighth note = 1000 / 8, etc.
    int noteDuration = 1000 / noteDurations[thisNote];
    tone(buzzer, melody[thisNote], noteDuration);
    // To distinguish the notes, set a minimum time between them.
    // The note's duration + 30% seems to work well:
    int pauseBetweenNotes = noteDuration * 1.30;
    delay(pauseBetweenNotes);
    // Stop the tone playing:
    noTone(buzzer);
  }
}


Connections and Adjustments
// Connections
// Arduino Nano 33 IoT :
//                                Nokia 5110 Screen
// D2  --------------------------- SCK (Clk)
// D3  --------------------------- MOSI (Din)
// D4  --------------------------- DC
// D5  --------------------------- RST
// D6  --------------------------- CS (CE)
//                                Rotary Potentiometer
// A0  --------------------------- S
//                                Button (Right)
// A1  --------------------------- S
//                                Button (Left)
// A2  --------------------------- S
//                                Button (OK)
// A3  --------------------------- S
//                                Button (Up)
// A6  --------------------------- S
//                                Button (Down)
// A7  --------------------------- S
//                                RGB LEB (RCGB)
// D12 --------------------------- R
// D11 --------------------------- G
// D10 --------------------------- B
//                                Buzzer
// D8  --------------------------- +
//                                Vibration Motor
// D9  --------------------------- +
After completing and uploading the code, I attached all required components to the board via headers - the Arduino Nano 33 IoT, the Nokia 5110 Screen, and the potentiometer knob.

Modes and Features
🕷🕸 First of all, the device checks for a successful WiFi connection. Then, if connected, it displays the interface (menu).


🕷🕸 The device shows four different modes on the interface:
- A. This Week
- B. Next Week
- C. Previously
- D. Graphics

🕷🕸 The device allows the user to select a mode (option) on the interface via the control buttons:
- Up ➡ Go Up
- Down ➡ Go Down
- OK ➡ Activate
🕷🕸 While selecting a mode on the interface with the Up and Down buttons, the device turns the RGB LED to a different color for each mode and activates the vibration motor to notify the user.
- This Week ➡ Purple
- Next Week ➡ Cyan
- Previously ➡ Yellow
- Graphics ➡ Green
🕷🕸 After activating any modes, the device lets the user return to the interface by pressing the Up or Down button.
📌 A. This Week
🕷🕸 The device plays the Spider-Man theme song (1967).

🕷🕸 The device connects to the web application (New Comics Releases) to retrieve and query this week's comics release list.

🕷🕸 The device displays the fetched comics release list and date, including these publishers:
- Marvel Comics
- DC Comics
- Image Comics (optional)

🕷🕸 The device allows the user to scroll the obtained comics release list by using the Right and Left buttons.

📌 B. Next Week

🕷🕸 The device plays the Spider-Man theme song (1967).

🕷🕸 The device connects to the web application (New Comics Releases) to retrieve and query next week's comics release list.

🕷🕸 The device displays the fetched comics release list and date, including these publishers:
- Marvel Comics
- DC Comics
- Image Comics (optional)

🕷🕸 The device allows the user to scroll the obtained comics release list by using the Right and Left buttons.

📌 C. Previously

🕷🕸 The device plays the Spider-Man theme song (1967).

🕷🕸 The device connects to the web application (New Comics Releases) to retrieve and query the previous week's comics release list.

🕷🕸 The device displays the fetched comics release list and date, including these publishers:
- Marvel Comics
- DC Comics
- Image Comics (optional)

🕷🕸 The device allows the user to scroll the obtained comics release list by using the Right and Left buttons.

📌 D. Graphics

🕷🕸 The device lets the user show different graphics (monochrome images) by adjusting the potentiometer value from 1 to 10 :)


Demonstration
After completing all steps above, I placed the device in my bookcase as a fitting and stylish decoration, where I store my comic book collection. It works stupendously :)

Project GitHub Repository
The project's GitHub repository provides:
- Code files
- PCB design files (Gerber)
Schematics


Code
Custom assets
See on other platforms
Related projects

IoT Twitter Follower Tracker and Status Notifier
Via Nano 33 IoT, display the follower count of a given Twitter account and its current follower status - STABLE, DEC, or INC.
Jigglypuff IoT Carbon Dioxide and Dust Monitor (Tracker) w/ Telegram
Based on Arduino Nano RP2040 Connect, display the dust density (mg/m3) and the carbon dioxide (CO2) density (ppm) via a Telegram bot.

AI-assisted Pipeline Diagnostics and Crack Inspection w/ mmWave
Extract data items from a 60GHz mmWave sensor, train a NN to diagnose pipeline defects, and inspect model results w/ deformed pipe images on a web app.

IoT Heart Rate (BPM) Monitor and Tracker w/ Tuya Smart
With ESP8266 and Arduino, observe the heart rate (BPM) generated by MAX30102 on Tuya Cloud compatible w/ Android and iOs.

Darth Vader IoT Cryptocurrency Tracker and Display w/ Pico
Monitor real-time cryptocurrency data and get notified when there is a price depletion or surge with Raspberry Pi Pico and ESP8266 ESP-01.