


Make an Enhanced R2-D2 to Be Controlled by an Android App
July 25, 2017


Navigation Bar
Apply Theme
- Introduction
- Keywords
- Brands
- Hardware
- Software
- Description
- Making the Structure
- Creating an App
- Commands screen
- Functions screen
- Connecting Components to Arduino
- 1) Commands
- 2) Functions
- Nokia interface
- Putting Together All the Parts
- Videos
- Project GitHub Repository
- Schematics
- Code
- Custom assets
- See on other platforms
- Related projects
Make an R2-D2 replica and control it by an app you programmed. Add a Nokia interface which gives you the Star Wars characters info.
Keywords
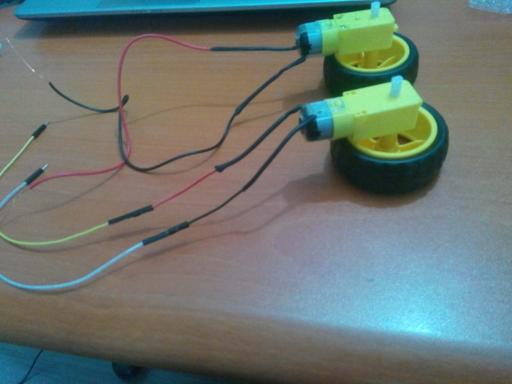
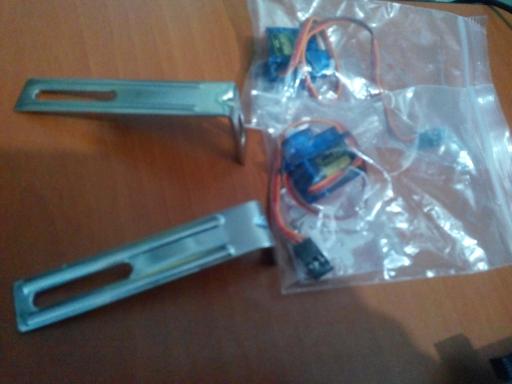
Hardware
- Arduino Due1
- Arduino Uno2
- HC-06 Bluetooth Module2
- Tower Pro SG90 RC Mini Servo Motor4
- Feetech FS90R Continuously Rotary Micro Servo Motor1
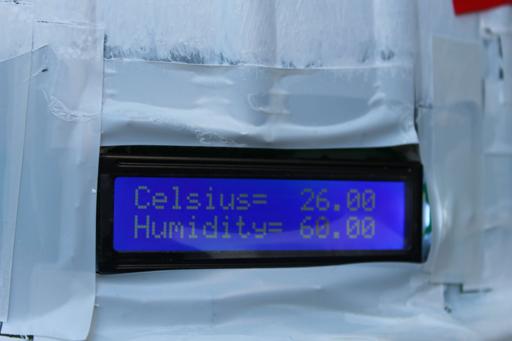
- DHT11 Temperature & Humidity Sensor 1
- LCD Screen (16,2)1
- L298N Pair Motor Drivers 2
- Wheel and DC Motor Kits 4
- Ultrasonic Sensor - HC-SR04 5
- Breadboard 1
- Mini Breadboard 2
- 74HC595 Shift Register 1
- 4-Way Relay 1
- Buzzer 1
- RGB 1
- Fan (which works with 220V) (optional) 1
- Plasma Globe (which works with 220V) (optional) 1
- Bulb (which works with 220V) (optional)1
- Nokia 5110 LCD Screen 1
- Button 3
- LED 9
- 2 Axis Joystick Board 1
- Resistor 10k ohm 4
- Resistor 220 ohm 9
- 9V Battery 5
- 9V Battery Clip 2
- 9V Barrel Jack Connector 3
Software
Description
As if you live in Tatooine, make an R2-D2 replica which is capable of doing a lot of tasks you choose with only what you can find in your home such as old toys, old trash box or 3D-printed parts. Control it by an app you programmed and add it a Nokia interface which gives you the info about Star Wars characters.
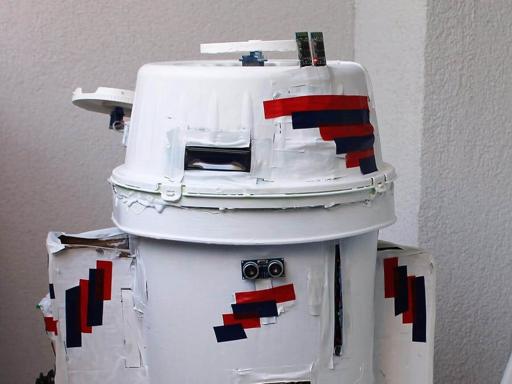
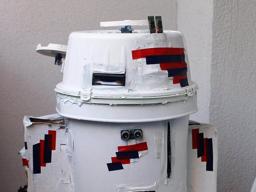
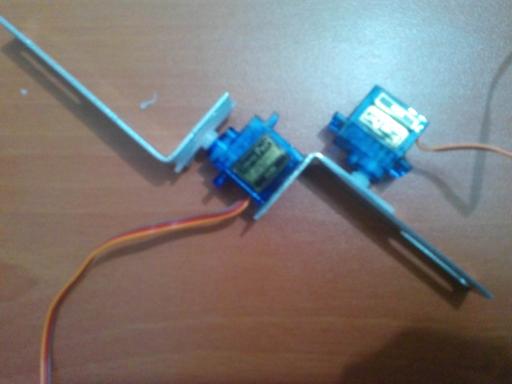
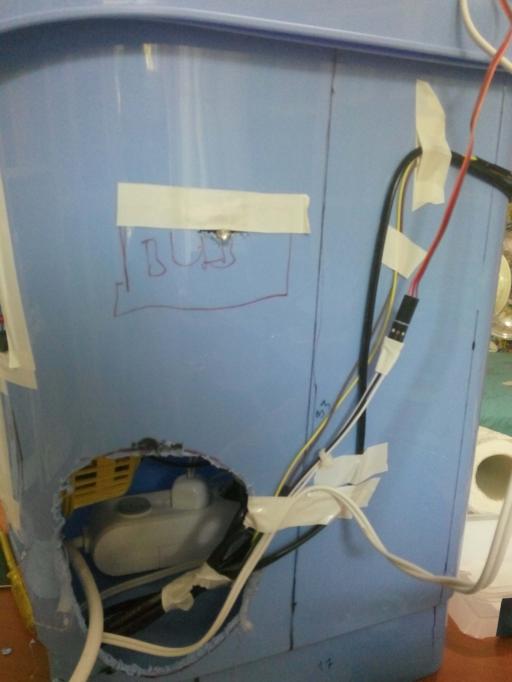
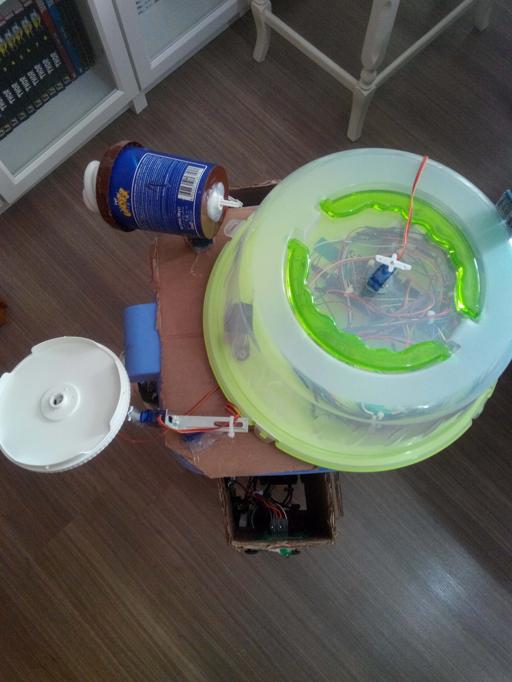
Making the Structure
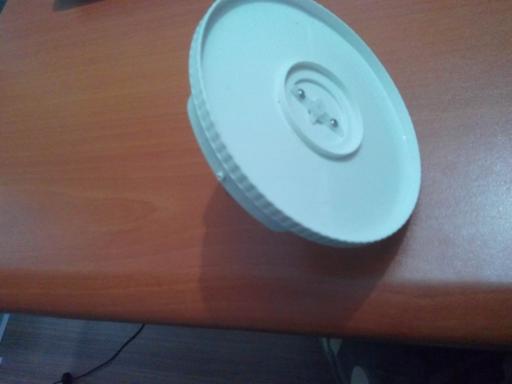
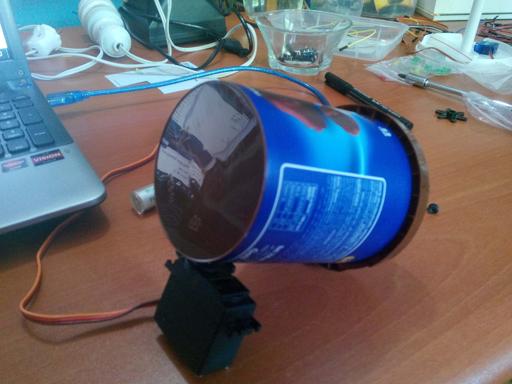
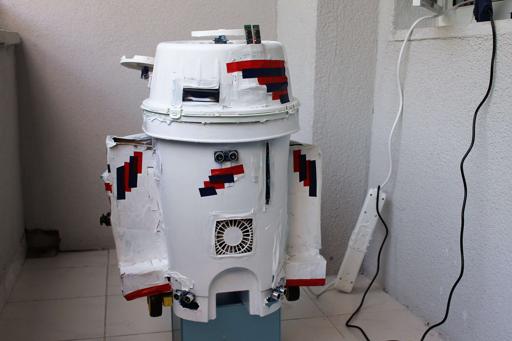
While I was watching Star Wars movies, I had thought about making an R2-D2 replica as many Star Wars fan did. And if you search on Google, you can find magnificent jobs but I wanted to do it with what I had in my home like Anakin in the first prequel movie. So, I used an old trash box, cardboard and an old plastic bowl for structure. Absolutely, it is not as same as real R2-D2 at the view, but my real aim is to make an R2-D2 replica controlled by an app and to create its structure with only things what I found so if you want a better structure than mine, you can buy an R2-D2 replica or fabric it with 3D-printer.
Creating an App
MIT App Inventor is the easiest IDE for programming an app because using MIT App Inventor makes programming as solving a puzzle. I added two screens (Commands and Functions) to the app and you can connect on each of them to the related Arduino Board with Bluetooth buttons. When the app is initialized, notifications help you what happens at the next move and when you scroll the screen from one to another, some R2-D2 voices occurs (I found them from here: http://www.r2d2translator.com). When a button is clicked, it sends a unique char for a unique task, for instance, 'd' is for activating the robot arm to turn right.
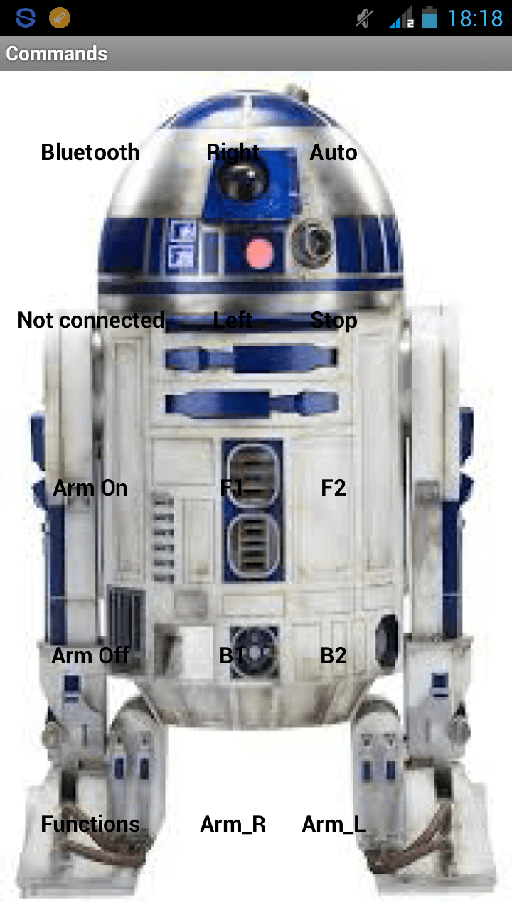

Commands screen
When Bluetooth module is connected, the connected button turns green.
- Control the robot arm turning part with Arm On/Arm Off buttons.
- Turn the head with Right/Left buttons.
- Turn the robot arm with Arm_R/Arm_L buttons.
- Operate DC motors with F1/F2/B1/B2/Stop buttons.
- Initiate the basic obstacle recognition system for 4 minutes with Auto button.
Go to Functions screen with Functions button.
Functions screen
When the Bluetooth module is connected, the connected button turns green.
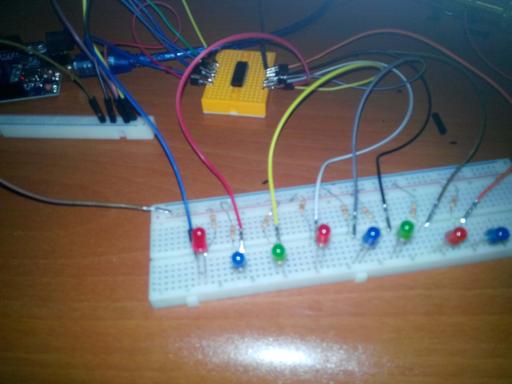
- Change the color of the RGB LED with Blue/Green/Red buttons.
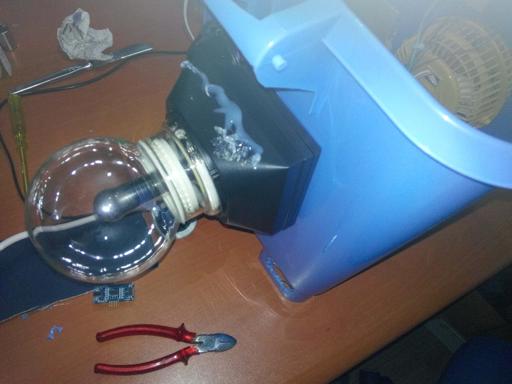
- Turn on the bulb, the plasma globe and the fan (I had these objects while I was making the project, if you have different objects, you can add them - up to four) with Bulb/Plasma Globe/Fan buttons.
- Turn off the bulb, the plasma globe, the fan and the RGB LED with Off button.
- Activate 74HC595 shift register different patterns with Active/Inactive buttons.
- Play songs you choose with Buzzer button.
- Turns the bulb with Bulb_R/Bulb_L buttons.
- Go to Command screen with Commands button.
And this display shows the project page on Hackster.io.
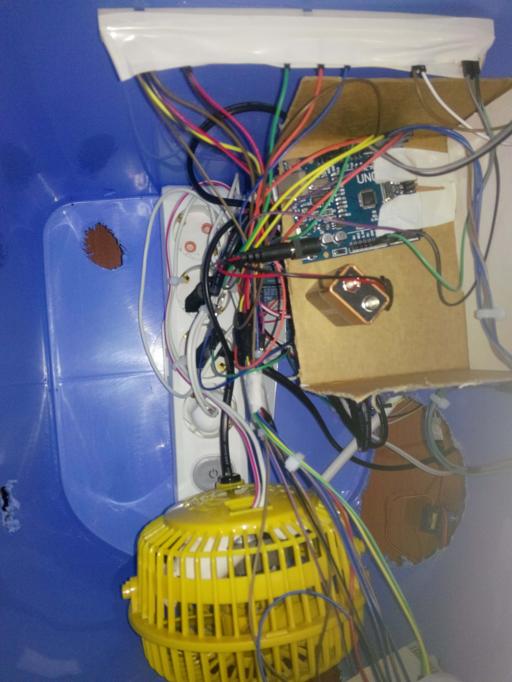
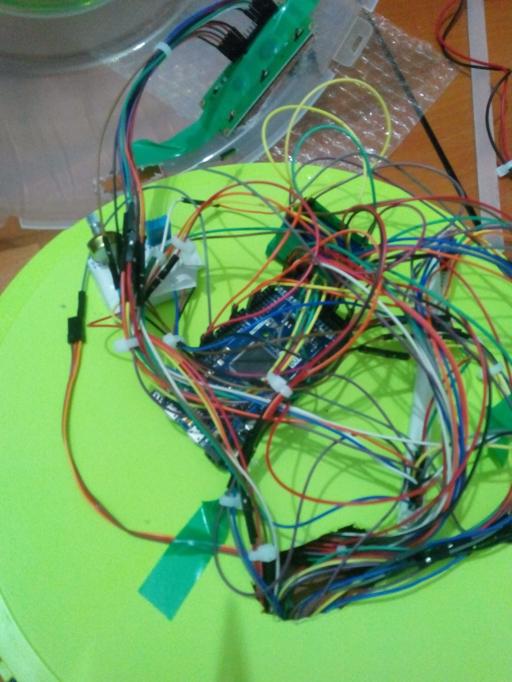
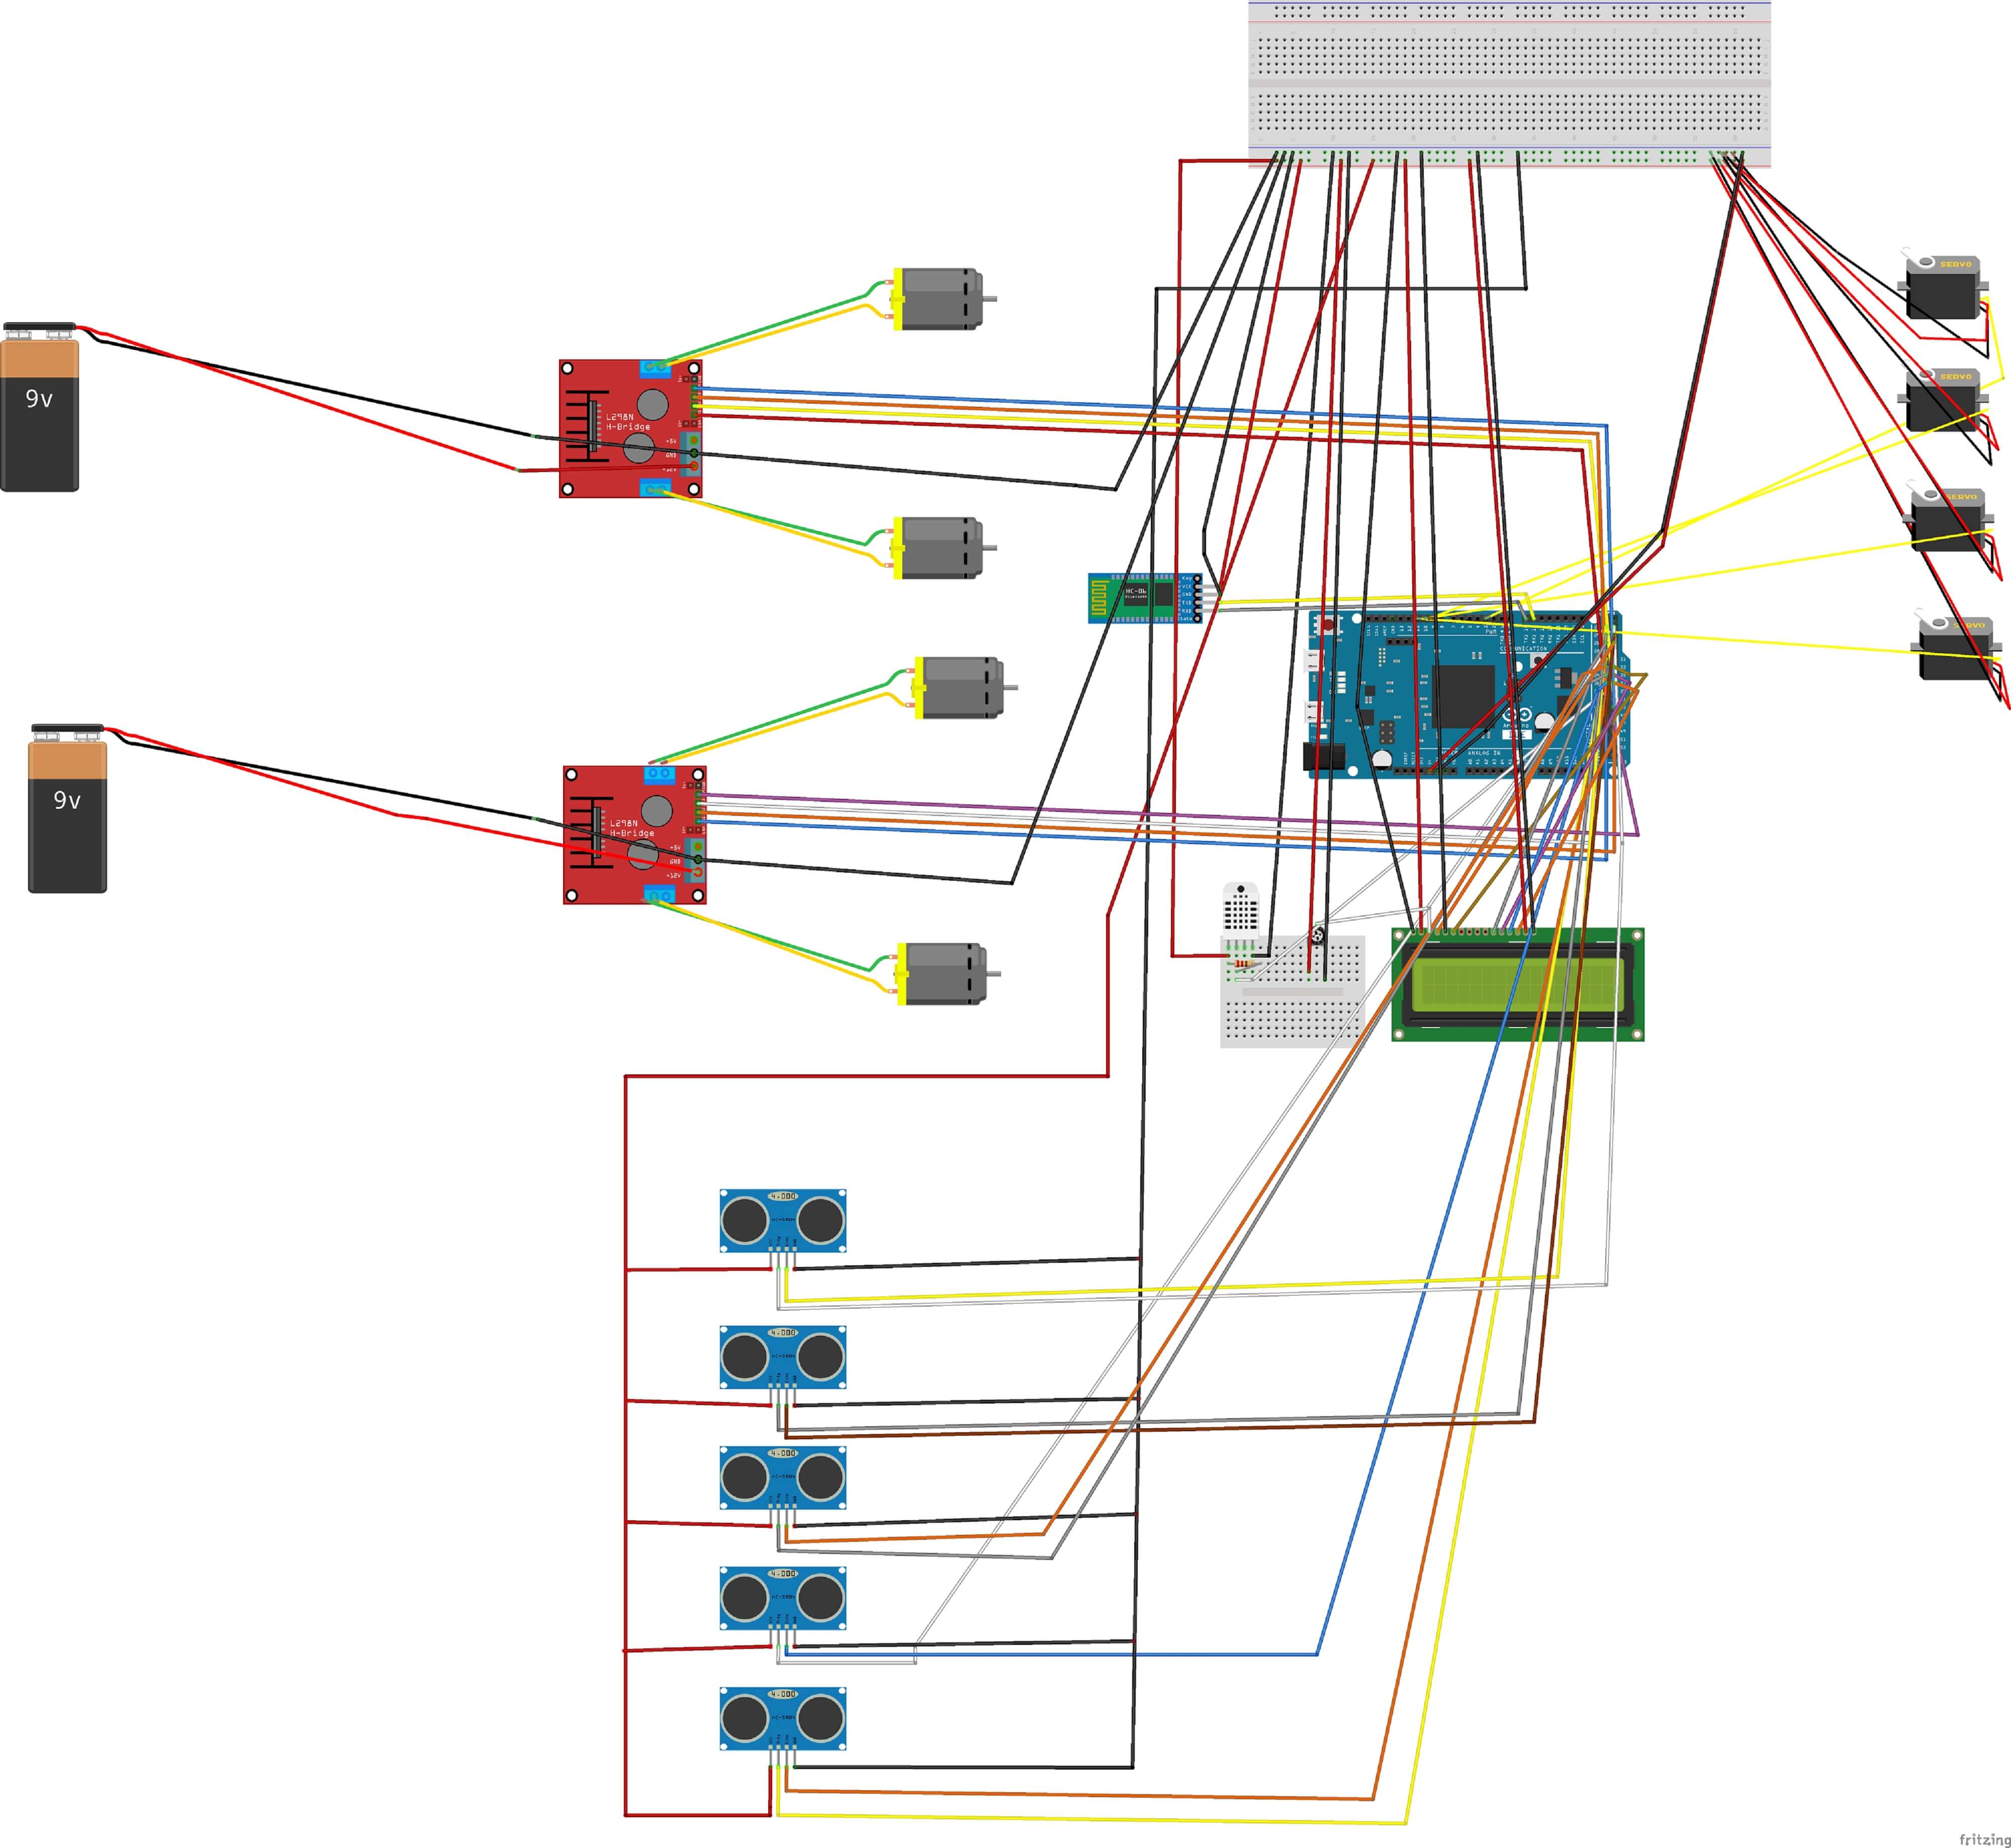
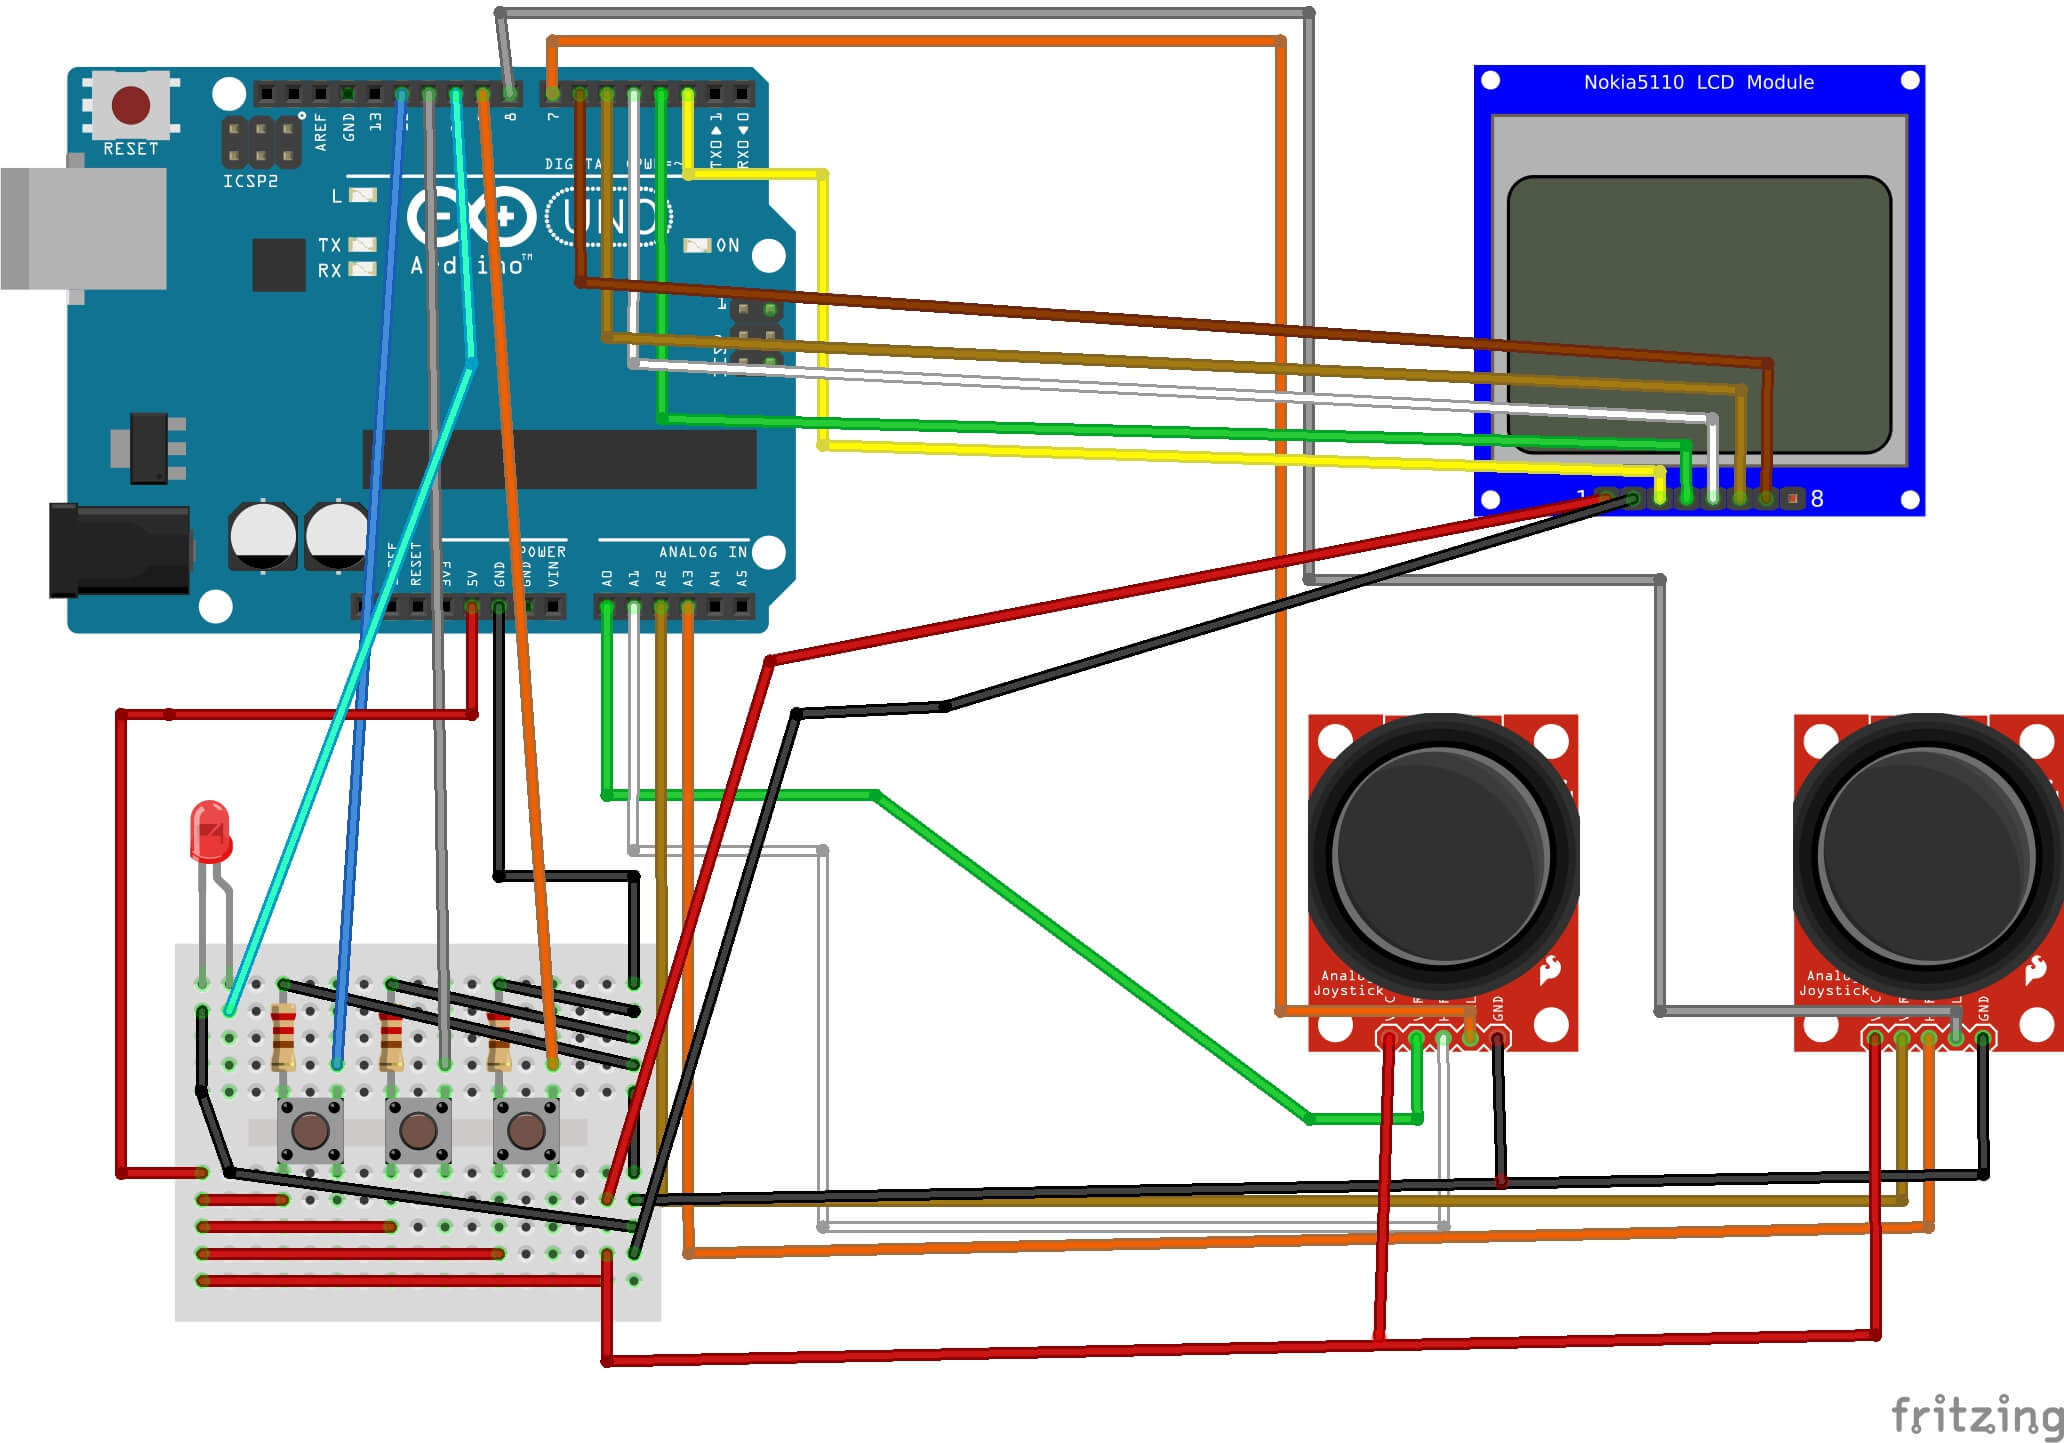
Connecting Components to Arduino
1) Commands
First of all, you have to change the first HC-06 module name to "Commands" with AT commands for proceeding app with accurate data. After doing that, you can wire up all components to Arduino Due. Details are clarified in R2-D2 Commands code at Code part. 9V battery (Indeed, lithium ion batteries can be used) is adequate for all components on board. And two 9V batteries are required to operate DC motors.
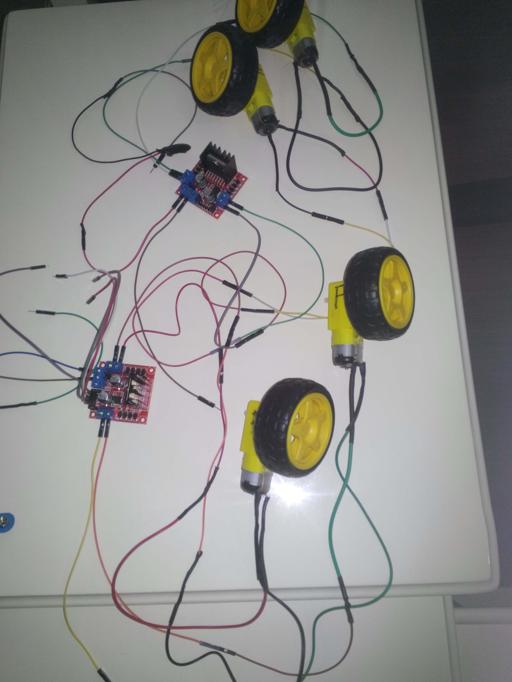
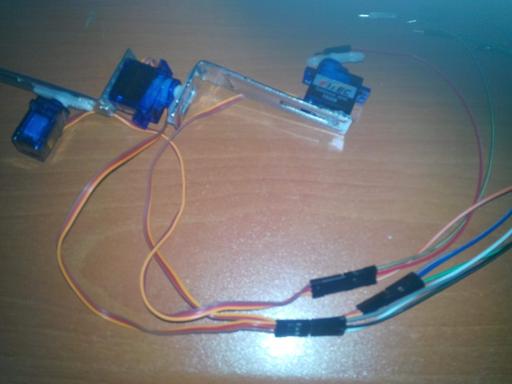

2) Functions
First of all, you have to change the second HC-06 module name to "Functions" with AT commands for proceeding app with accurate data. After doing that, you can wire up all components to the second Arduino Uno. Details are clarified in R2-D2 Functions code at Code part. A 9V battery (indeed, lithium ion batteries can be used) is adequate for all components on board.


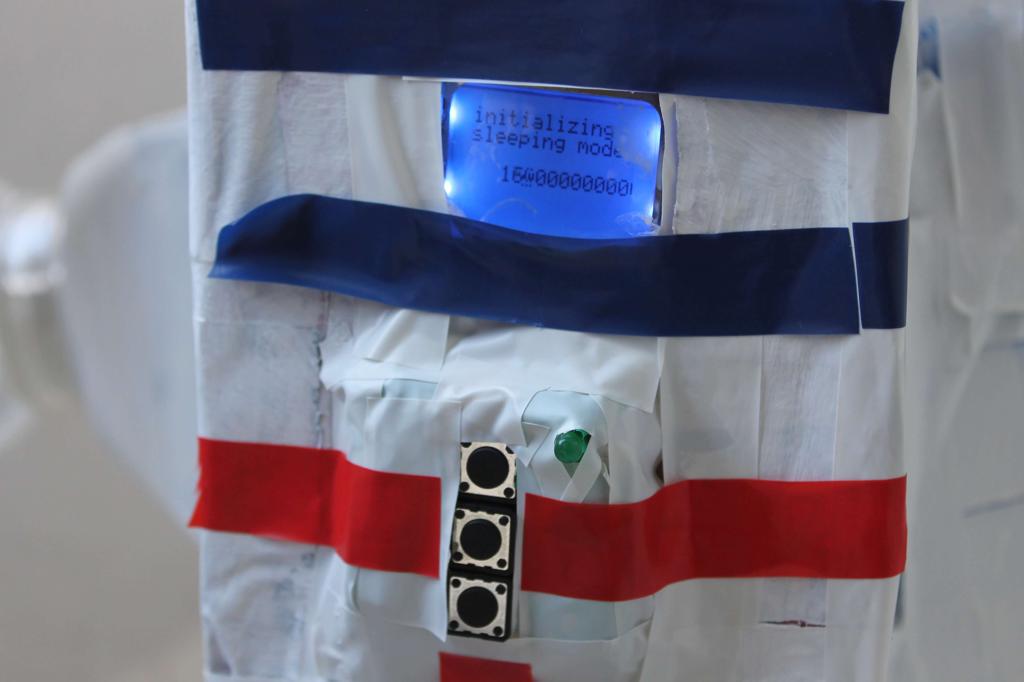
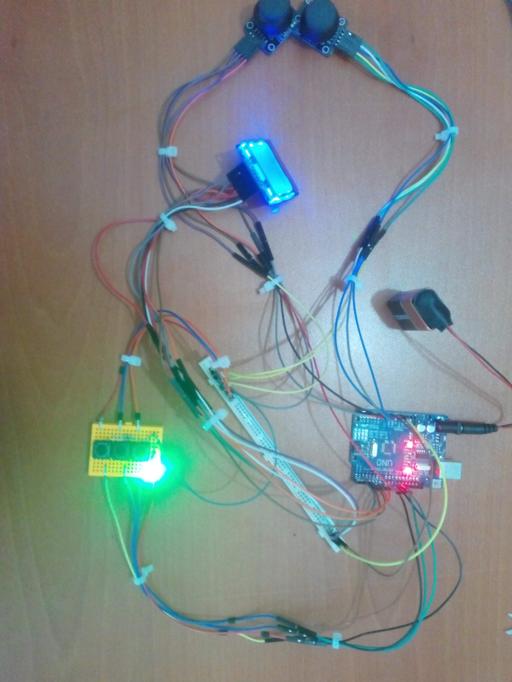
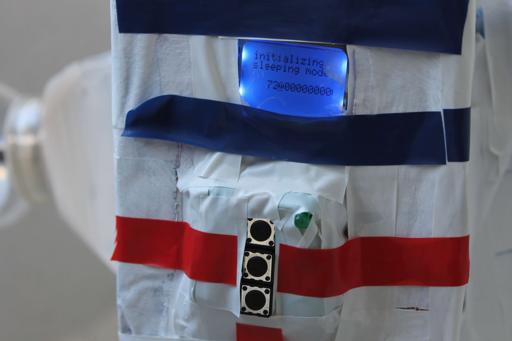
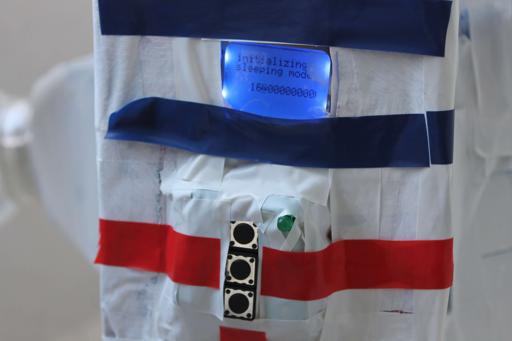
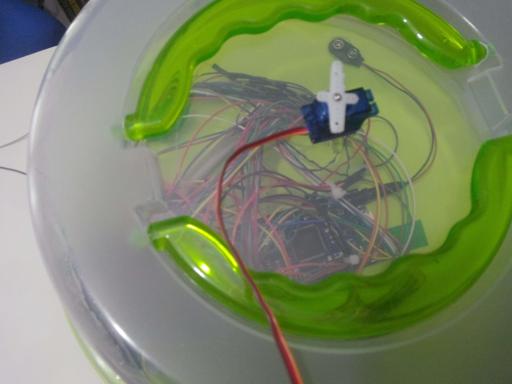
Nokia interface
This part of the project gives your replica an interactive screen that has three display you can choose. Screen 1 is initialized with pushing button 1 after that it shows Sleeping Mode display. Screen 2 is initialized with pushing button 2 after that it shows Pictures Section display and starts unsleeping mode on Nokia 5110 screen. Screen 3 is initialized with pushing button 3 after that it shows Info display. On Screen 3, you can select characters by joysticks movements and when joysticks buttons are clicked, comes up a scrolling text about the selected character. Furthermore, if you choose master Yoda on Info display, the green LED which is on top of the buttons is activated until another character is selected. Details are explained in R2-D2 Functions code at Codes part.
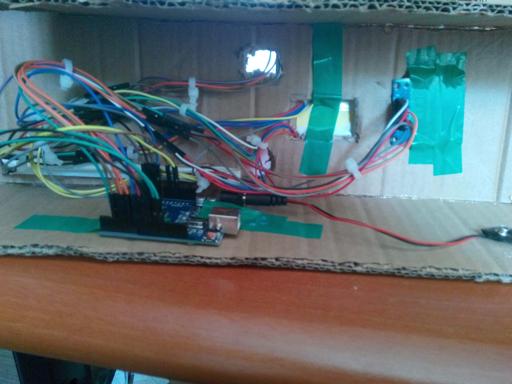


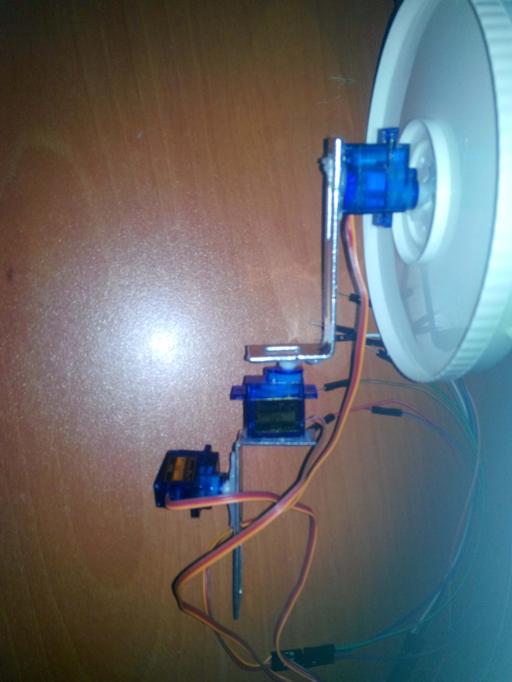
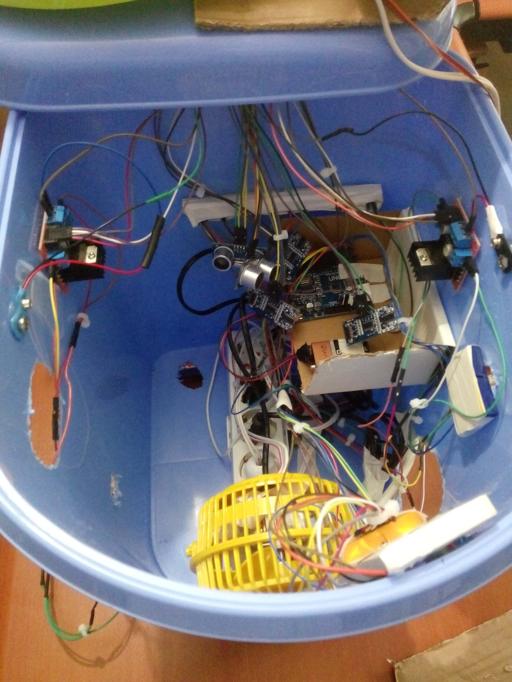
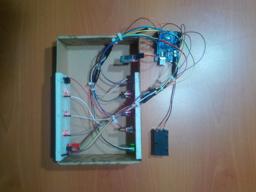
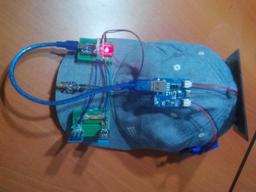
Putting Together All the Parts
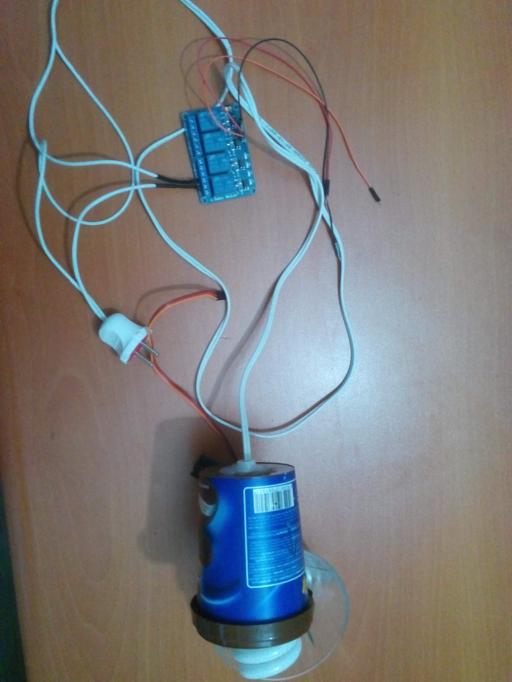
The way of setting up the R2-D2 replica depends on what you have, I used a soldering iron and jumper wires for Arduino connections. And for the R2-D2 replica connections, I used a silicone gun.
According to the size of your structure, you can set up the replica whatever way you want. I set up it like this:


Videos
Project GitHub Repository
The project's GitHub repository provides:
- Code files
- Mobile application AIA and APK files (Android)
Schematics

Code
Custom assets
Assets
See on other platforms
Related projects

Mobile Water Level Tracker
View the water integrity and level of selected areas on your Android phone by using an HC-06 Bluetooth module to make an irrigation system.
Create a People Counter controlled by an Android app
Make a people counter that detects the number of people who enter the room using lasers and LDRs and control it with an Android app.

Bluetooth Mobile Remote Lamp with Weather Station
Control your room lighting system and display weather information via specifically developed Android application and a uniquely designed PCB.
Mobile Weather Station Being Powered by Solar Energy
Get the weather information through an Android app constantly and use the solar energy generated by the PV panel to charge devices.

Bluetooth-enabled Snowman Weather and Air Quality Gift Card
Via the gift card's Android application, adjust its RGB eye color and display weather and air quality information on the ST7789.