


The Welcome Gadget
November 6, 2017


Navigation Bar
Apply Theme
Make your room untouchable while you are not in it by using an Arduino and two HC-SR04 sensors.
Keywords
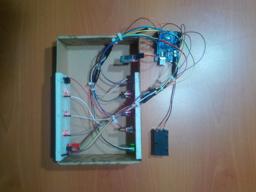
Hardware
- Arduino Mega[1]
- Arduino Proto Shield[2]
- HC-06 Bluetooth module[2]
- SparkFun Pushbutton[2]
- Mini Breadboard[3]
- Potentiometer [1]
- 4X4 Matrix Keypad[1]
- Buzzer [1]
- Led [4]
- LCD Screen(20,4) [1]
- Ultrasonic Sensor - HC-SR04 [2]
- Servo Motor [1]
- Breadboard [1]
- Resistor 220 ohm [4]
- Resistor 10K ohm [2]
- 9V Battery [2]
- 9V Battery Cable [2]
- 2-Way Joystick Shield (ywRobot) [1]
Software
Description
I wanted to notify someone who enters my room without my permission while I am not in my room but in my house so that it has a very short range to notify. The Welcome Gadget aims to detect that the person who enters your room whether know the password or not. And it is getting weirder to someone that does not know the password every second.
Connecting
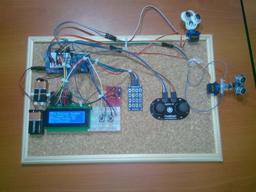
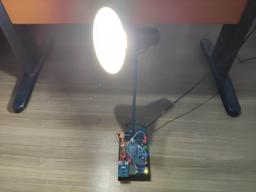
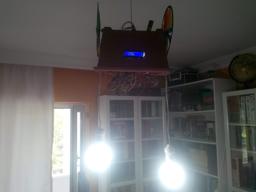
Just make the connections through the instructions below and paste all parts using a silicon gun to a cork board. (I used one of them but if you have other things you can easily hang on the wall, you can use it too.)
// Arduino Mega
//                                            4x20 LCD Screen
// Pin 45   ---------------------------------- rs
// Pin 44   ---------------------------------- en
// Pin 43   ---------------------------------- d4
// Pin 42   ---------------------------------- d5
// Pin 41   ---------------------------------- d6
// Pin 40   ---------------------------------- d7
//
//                                            4x4 Matrix Keypad
// Pin 50   ---------------------------------- ROW
// Pin 51   ---------------------------------- ROW
// Pin 52   ---------------------------------- ROW
// Pin 53   ---------------------------------- ROW
// Pin 46   ---------------------------------- COLS
// Pin 47   ---------------------------------- COLS
// Pin 48   ---------------------------------- COLS
// Pin 49   ---------------------------------- COLS
//
//                                            Buzzer
// Pin 3   -----------------------------------
//
//                                            LED
// Pin 4   -----------------------------------
// Pin 5   -----------------------------------
// Pin 34  -----------------------------------
// Pin 35  -----------------------------------
//                                            BUTTONS
// Pin 36  -----------------------------------
// Pin 37  -----------------------------------
//                                            Joystick (1)
// Pin A8  ----------------------------------- X
// Pin A9  ----------------------------------- Y
// Pin 38  ----------------------------------- KEY
//                                            Joystick (2)
// Pin A10 ----------------------------------- X
// Pin A11 ----------------------------------- Y
// Pin 39  ----------------------------------- KEY
//                                            HC-SR04 (1)
// Pin 32  ----------------------------------- Trig
// Pin 33  ----------------------------------- Echo
//                                            HC-SR04 (2)
// Pin 30  ----------------------------------- Trig
// Pin 31  ----------------------------------- Echo
//                                            Servo Motor (1)
// Pin 9   -----------------------------------
//                                            Servo Motor (2)
// Pin 10   -----------------------------------


Starting
When the welcome gadget is started, the initializing screen displays on the 4x20 LCD screen. After that you can choose between the Control_command and the Scan_command with push buttons.

Scan command
- It is activated with the first push button and while Scan_command is running, the green led is on.
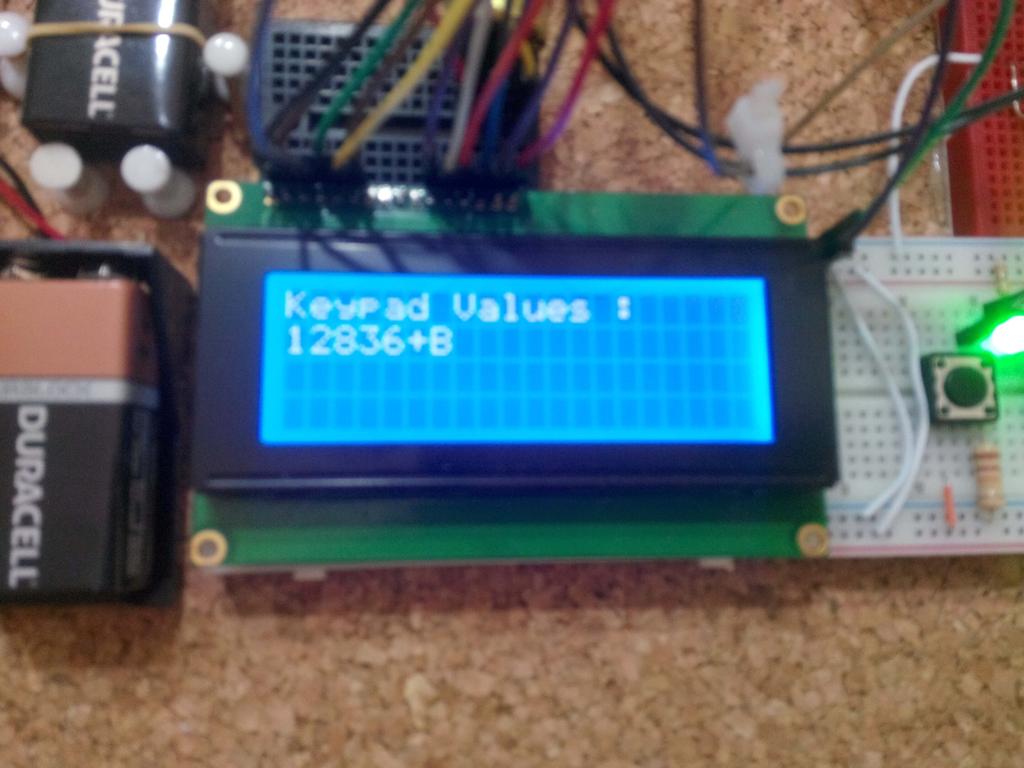
- When the first joystick is clicked, Keypad Values is running and you can write numbers with the classic Keypad voices (each number equals a note) on the LCD screen. A little Easter egg for the user writing numbers, if your birthday is written correctly, "Happy Birthday!" blinks on the LCD screen until "XXXX" is written.
- When the second joystick is clicked, lcd.clear() command is activated and all other commands deactivated.
- The alert mode opens with a little optimization setting because of the privacy of the welcome gadget. You have to turn two joysticks into up position at the same time to initiate the alert mode although if you cannot complete it, the yellow led continues to blink.
- While the alert mode is activated, if a someone detected by the HC-SR04 sensors, the welcome gadget notifies you by using a buzzer and a blue led until the password is entered correctly.


Control command
- It is activated with the second push button and while Control_command is running, the red led is on.
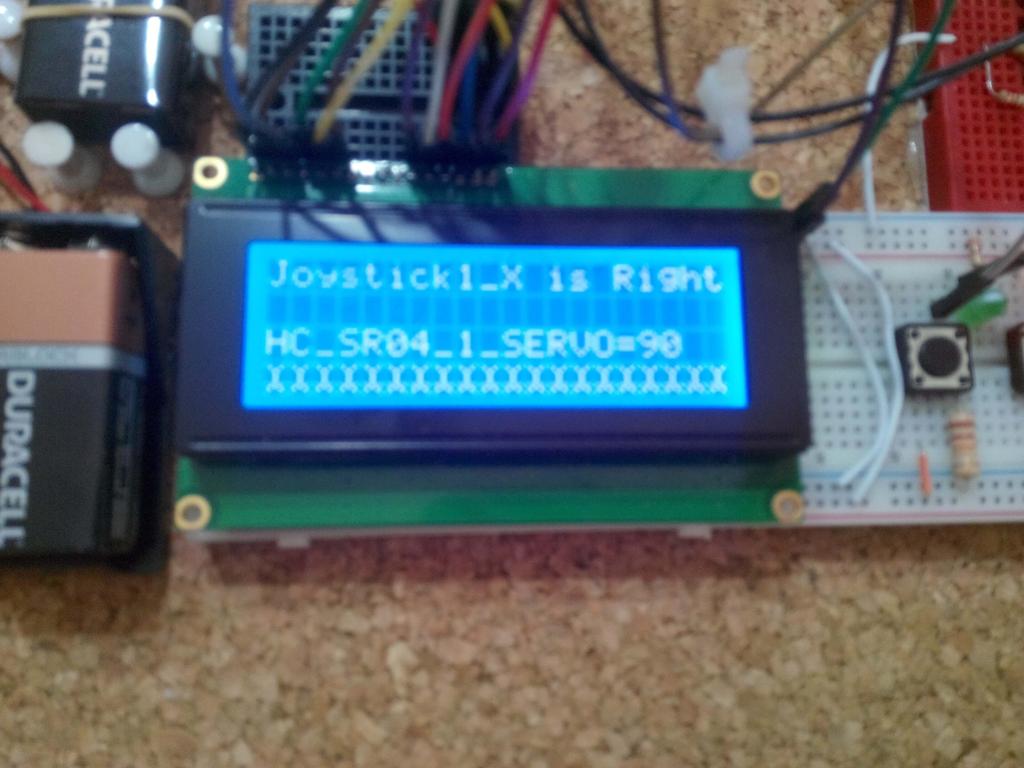
- You have to turn the joysticks into up position to observe the HC-SR04 sensors' values.
- Turning the joysticks into down, right, left positions allows you to control the angles of servo motors for defining the pattern of HC-SR04 sensors.
- Also, you can control the buzzer by the first joystick's button and the blue led by the second joystick's button.


Videos
Project GitHub Repository
The project's GitHub repository provides:
- Code files
Schematics

Code
See on other platforms
Related projects
IoT Tesla Coil and Cooling Fan on the Localhost
Develop a web application in PHP and JavaScript to control a Tesla coil and a cooling fan via Arduino Nano 33 IoT. Get information from the Tesla Coil Controller without needing to click to a classic submit button.

Mobile Water Level Tracker
View the water integrity and level of selected areas on your Android phone by using an HC-06 Bluetooth module to make an irrigation system.
RFID Desk Lamp
Supersede your old desk lamp with a new one controlled by an RFID tag or card and personalize it with an RGB color pattern to turn it off.
Create a People Counter controlled by an Android app
Make a people counter that detects the number of people who enter the room using lasers and LDRs and control it with an Android app.
Remote Lamp
How to make a lamp controlled by TV remote control.